Integrate authentication into Next.js
This guide shows how to create a simple Next.js application and secure it with authentication powered by Ory. The guide provides the setup for using Ory Network, but the code can be used with both Ory Network and self-hosted Ory software.
This guide is perfect for you if:
- You have Next.js installed.
- You want to build an app using Next.js.
- You want to give access to your application to signed-in users only.
Before you start, watch this video to see the user flow you're going to implement:
You can find the code of the sample application here.
Create Next.js app
First, create a new Next.js project. Run:
npx create-next-app@latest
cd app-name
When prompted, select the following options:
- Use TypeScript: Yes
- Use ESLint: Yes
- Use Tailwind CSS: Yes
- Use
src/directory: No - Use App Router: Yes
- Customize the default import alias: No
Create a new Ory project
- Create an Ory account at https://console.ory.sh
- Create a new project at https://console.ory.sh/projects/create
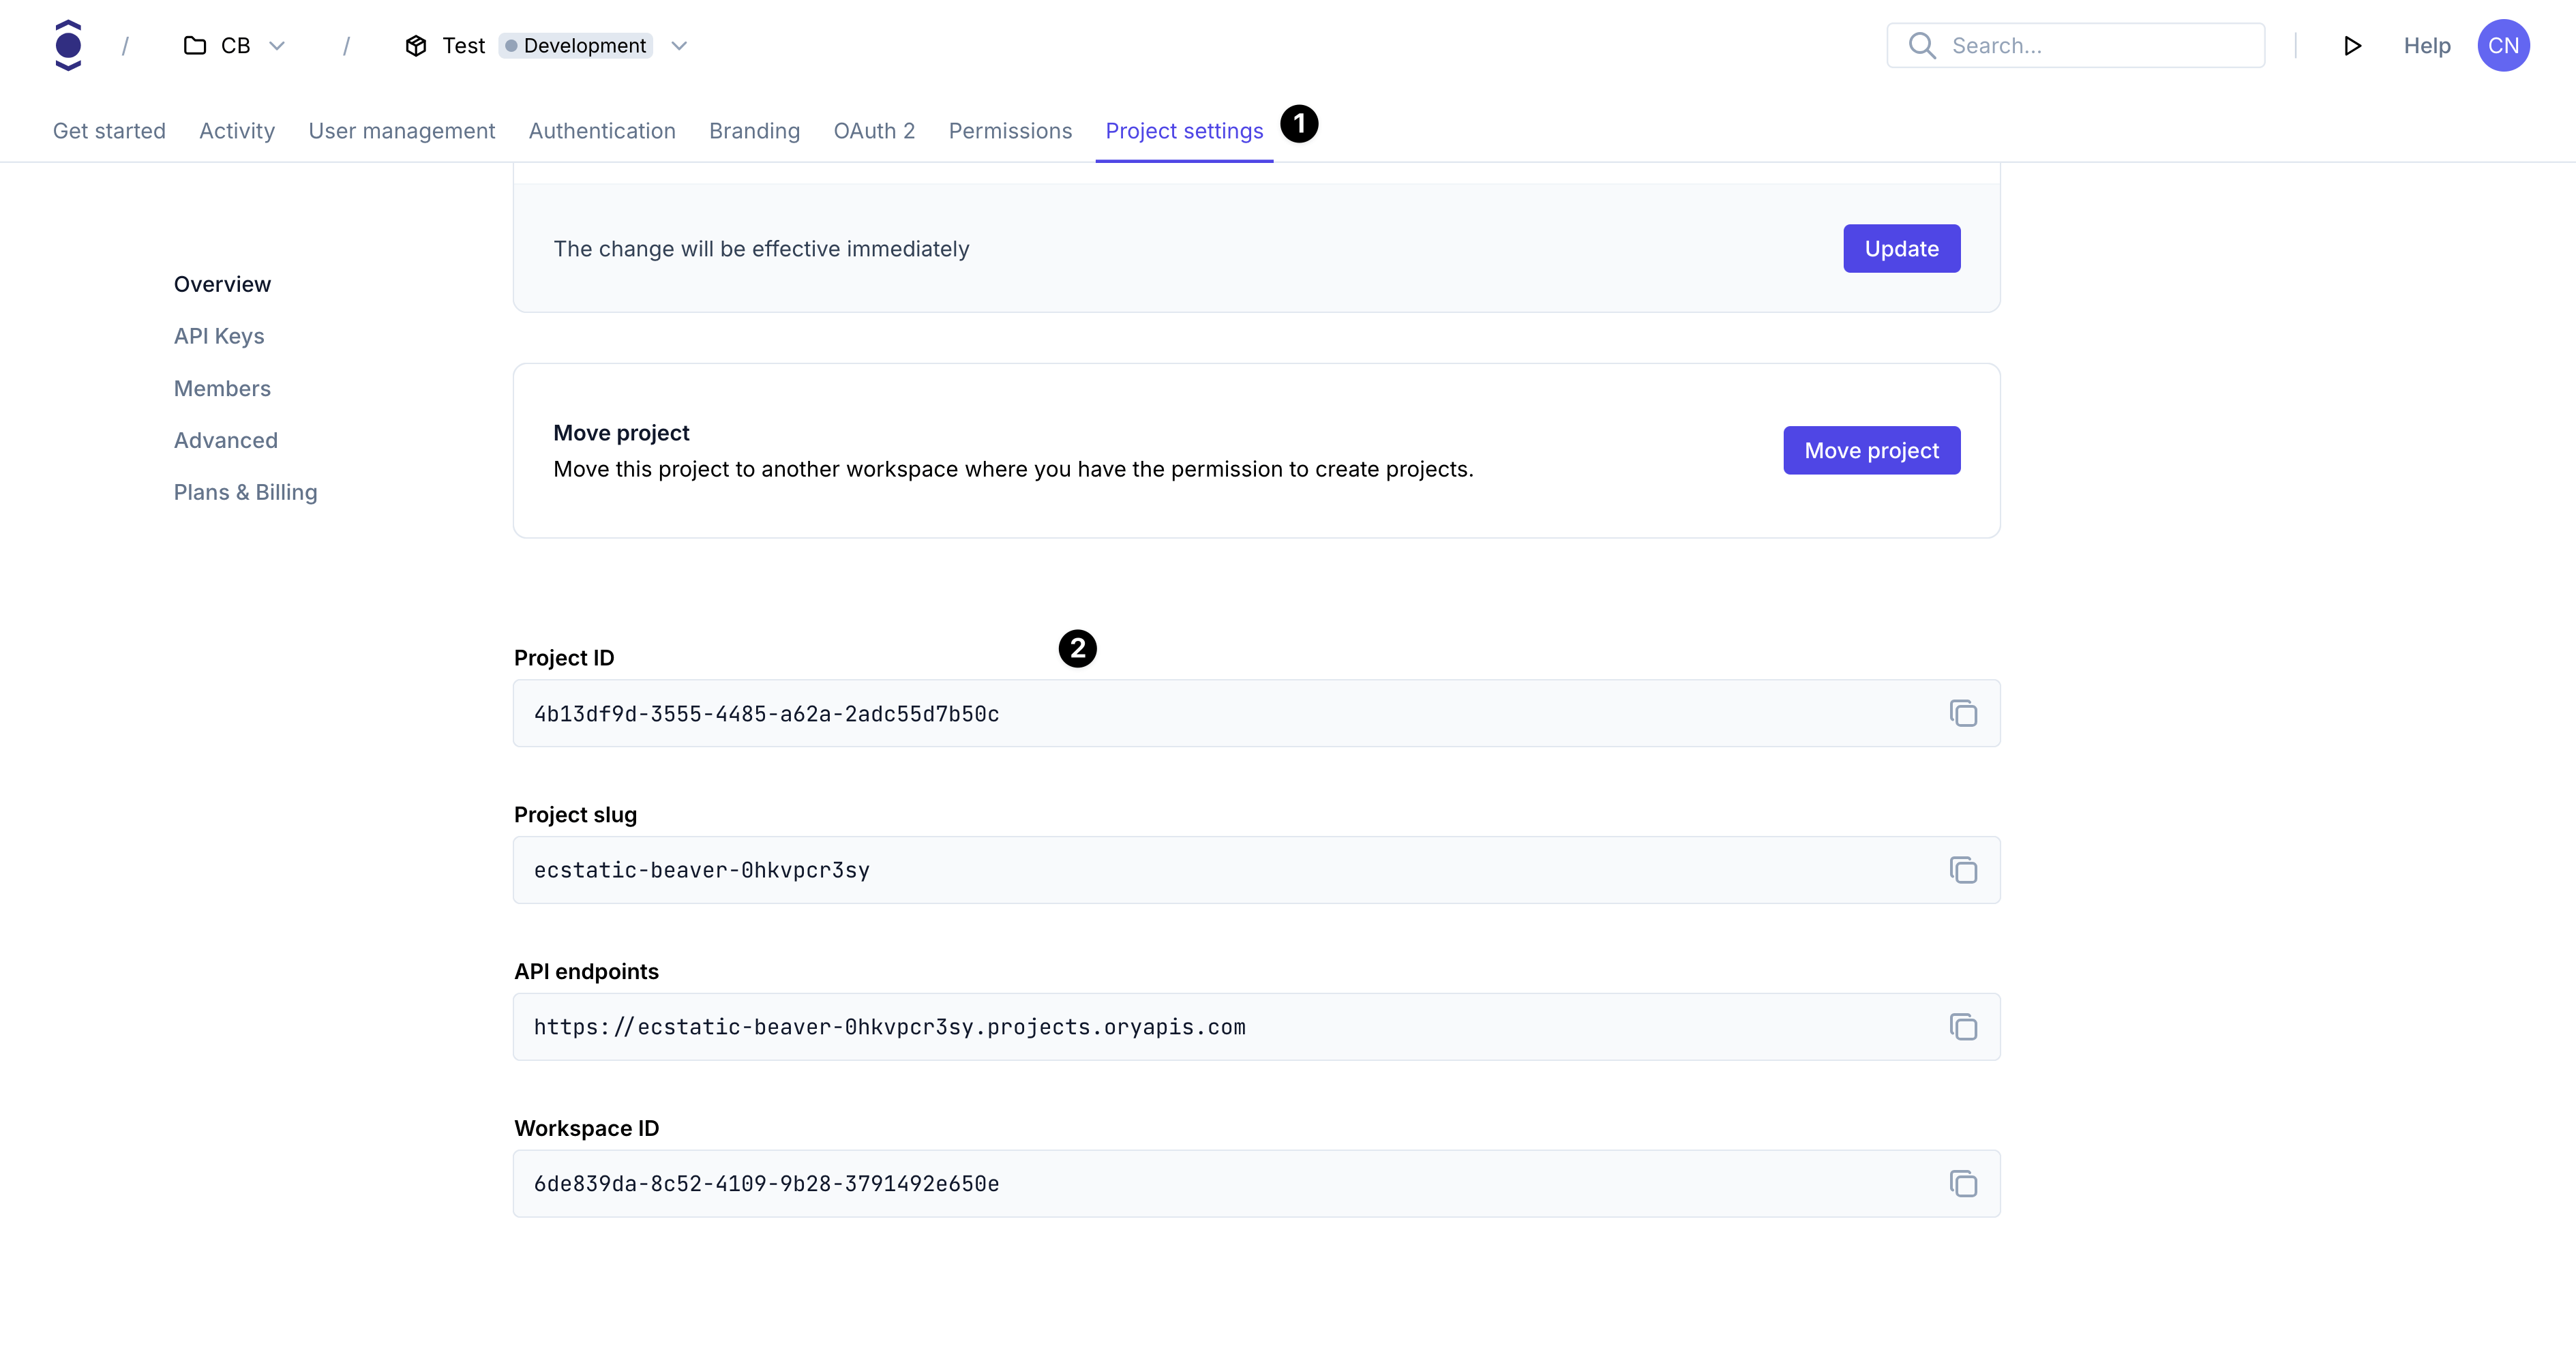
- Go to your project settings
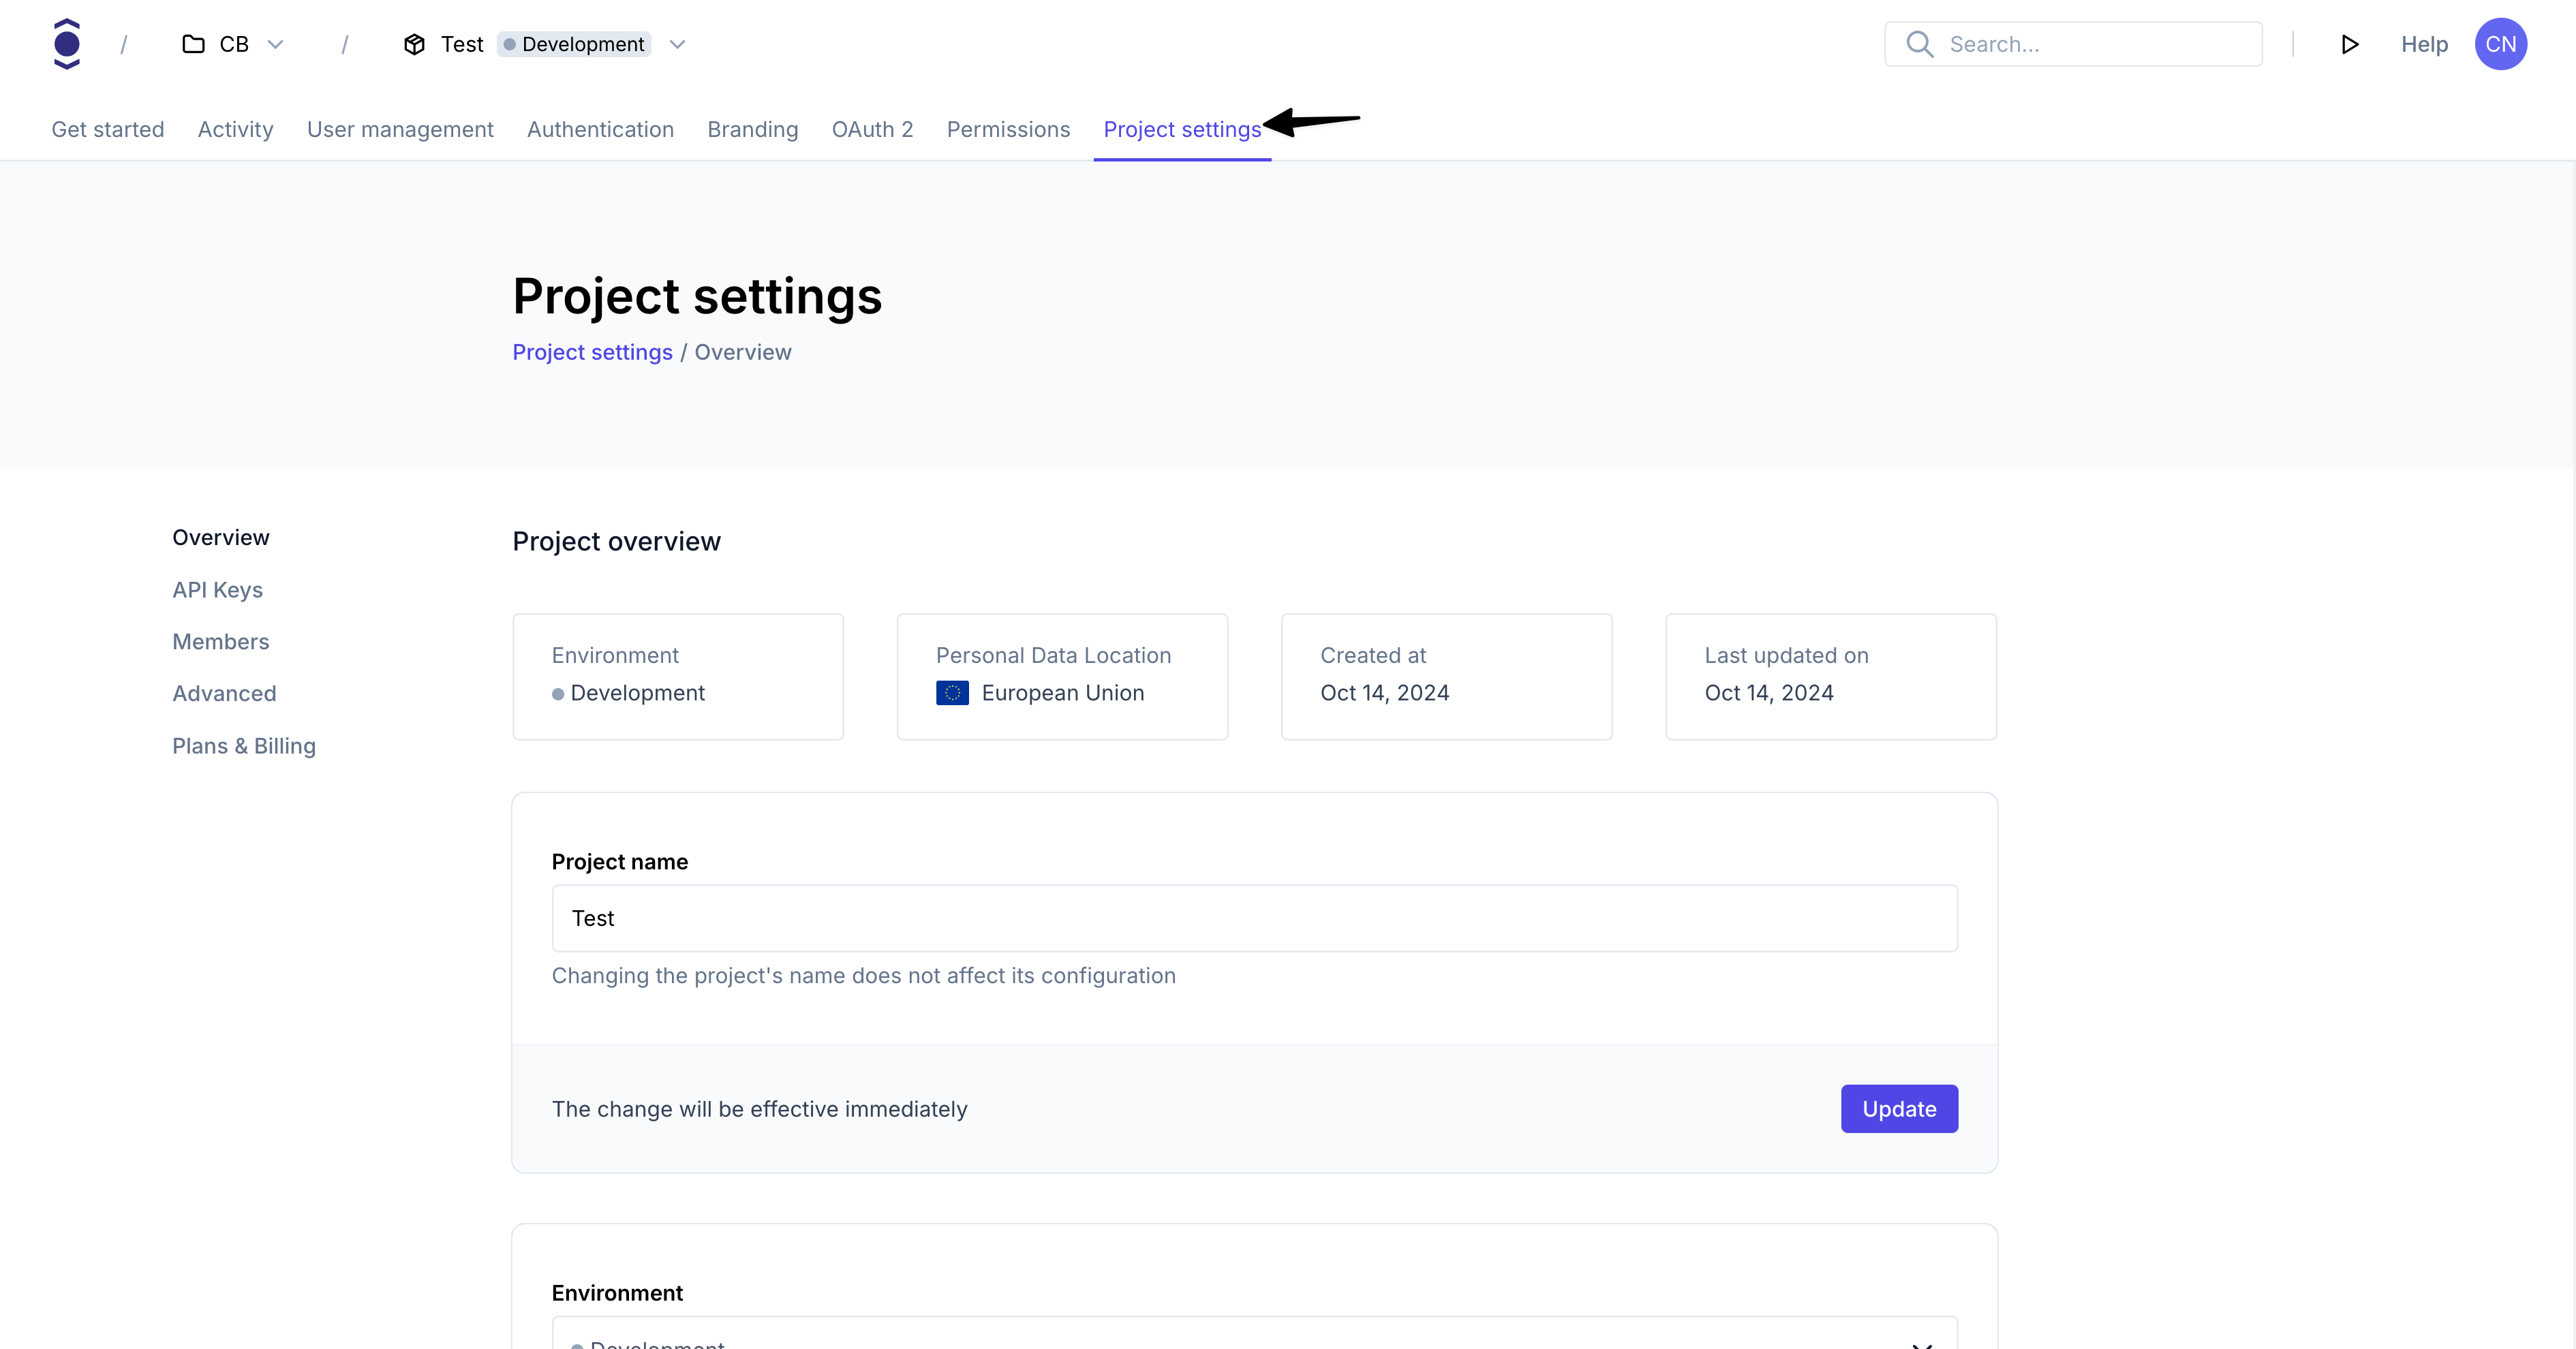
- Note down your project credentials (ID, slug, endpoint)
Install Ory CLI
Follow this guide to install the Ory CLI on your machine.
Why do I need the Ory CLI
The Ory security model uses HTTP cookies to manage sessions, tokens, and cookies. Because of browser security measures like
CORS, Ory APIs must be exposed on the same domain as your application.
In the case of this example the application runs on your local machine. The cookie domain is localhost.
Use either localhost or 127.0.0.1 consistently. Although technically they refer to the same machine, browsers treat them as
different cookie domains.
Ory CLI provides a convenient way to configure and manage projects. Additionally, the CLI provides Ory Tunnel - a tool that ensures cookies match the domain your application is currently on.
To make Ory APIs and your application available on the same domain, Ory Tunnel mirrors Ory endpoints and rewrites cookies to match
the correct domain. As a result, the domain of the cookies is set correctly to the domain you run the app on instead of
<your-project-slug>.projects.oryapis.com.
By using the Tunnel, you can easily connect the application you're developing locally to Ory Network and consume the APIs without additional configuration or self-hosting any Ory services.
To learn more about the Ory Tunnel, read the dedicated section of the Ory CLI documentation.
Run Ory APIs on localhost
In a new terminal window, run the Ory Tunnel:
ory tunnel --project <project-id> http://localhost:3000
This command mirrors Ory APIs on http://localhost:4000. Use that URL as the basePath for the @ory/client-fetch SDK.
Authenticate user
To implement authentication, modify the existing app/page.tsx component to include the following:
"use client"

import { useEffect, useState } from "react"
import { FrontendApi, Configuration, Session } from "@ory/client-fetch"

const basePath = process.env.NEXT_PUBLIC_ORY_SDK_URL || "http://localhost:4000"
const ory = new FrontendApi(
  new Configuration({
    basePath,
    credentials: "include",
  }),
)

export default function Page() {
  const [session, setSession] = useState<Session | null>(null)
  const [logoutUrl, setLogoutUrl] = useState<string | null>(null)

  useEffect(() => {
    // Check if the user is authenticated
    const checkSession = async () => {
      try {
        const session = await ory.toSession()
        setSession(session)

        // Get the logout URL once we have a session
        try {
          const { logout_url } = await ory.createBrowserLogoutFlow()
          setLogoutUrl(logout_url)
        } catch (logoutError) {
          console.error("Error creating logout flow:", logoutError)
        }
      } catch (error) {
        // No valid session found, redirect to Ory login
        window.location.href = `${basePath}/ui/login`
      }
    }

    checkSession()
  }, [])

  return (
    <main className="flex min-h-screen flex-col items-center justify-between p-24">
      <div className="w-full max-w-3xl">
        <div className="flex justify-between items-center mb-8">
          <h1 className="text-2xl font-bold">Welcome to Protected Page</h1>

          {/* Logout button */}
          {logoutUrl && (
            <a
              href={logoutUrl}
              className="px-4 py-2 bg-red-600 text-white rounded hover:bg-red-700 transition-colors"
            >
              Logout
            </a>
          )}
        </div>

        <div className="bg-gray-100 p-4 rounded-lg overflow-auto">
          <h2 className="text-lg font-semibold mb-2">Session Information:</h2>
          <pre className="text-sm">{JSON.stringify(session, null, 2)}</pre>
        </div>
      </div>
    </main>
  )
}
The component checks whether a user is signed in and if so, shows a logout link and the user's session information. Otherwise, it shows a login and registration link.
Run your Next.js app
Now that your app is ready, it's time to run it! Start the Next.js development server:
npm run dev
Go to localhost:3000 to access your application.
See it in action
Access your Next.js app at localhost:3000, sign in, and see if you can make authenticated requests to your API!
Go to production
To promote this app to production:
- Build the Next.js app and deploy it (for example on Vercel or Netlify)
- Connect your project with a custom domain
These components must be hosted on the same top-level domain as they were on your local machine:
| Component | Production | Local |
|---|---|---|
| Next.js App | www.example.org | localhost:3000 |
| Ory | ory.example.org | localhost:4000 |